In this
tutorial you'll learn how to paint a dot mandala on a Christmas ornament. Use unique tools and dot painting techniques
to create a colorful mandala dot painted Christmas ornament that would be
perfect on an ornament stand, Christmas Tree or other home decor. This would make a thoughtful handmade
gift.
Disclosure: All opinions are my own. I participate in the Amazon Affiliate program. That means I receive a commission when products are purchased through links posted on my videos. (At NO additional cost to you.) This allows me to bring you more videos! Thanks for supporting my channel and art work!
Here's a new mandala dot painting tutorial! In this tutorial you'll learn how to paint a dot mandala on an 8" x 8" canvas panel. Use unique tools and dot painting techniques to create a colorful mandala dot painted canvas panel that would be perfect as a gift or home decor. If you'd like to purchase the written pattern in my Etsy shop.
US Art Supply 8 X 8 inch Professional Artist Quality Acid Free Canvas Panel Boards for Painting 12-Pack (1 Full Case of 12 Single Canvas Board Panels) - http://amzn.to/2jBkYVB
Disclosure: All opinions are my own. I participate in the Amazon Affiliate program. That means I receive a commission when products are purchased through links posted on my videos. (At NO additional cost to you.) This allows me to bring you more videos! Thanks for supporting my channel and art work!
Learn to create a Mandala Dot Painting Trinket/Ring Dish using unexpected tools and great colors. Dot painting is so relaxing and meditative and you can do it on almost any surface. This little trinket dish would make a great holiday gift or home decor. Here's the video tutorial link. See materials list below the video.
In this tutorial you'll learn how to turn a plain terracotta dish into a beautiful ring/trinket dish. Use unique tools and dot painting techniques to create a colorful, lacy dot painted dish that would be perfect as a gift or home decor. It's functional too!
t
Disclosure: All opinions are my own. I participate in the Amazon Affiliate program. That means I receive a commission when products are purchased through links posted on my videos. (At NO additional cost to you.) This allows me to bring you more videos! Thanks for supporting my art work.
Been working on some polymer clay focal pendants. In this piece i've added leather cord and used silver wire and beads to create a free form bail. Love the way it turned out.
In my last post I shared my latest acrylic pour painting on 45 records I found at the thrift store. I love the way the paintings turned out. The DecoArt paint I used was luscious and I thought the technique was beautiful. It needed something though so I pulled out some polymer clay and tried a few different focal pieces.
The one on the top right is a traditional swirl, left is a spikey flower and finally bottom right is a rose style focal.
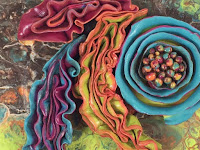
I tried all of these out and finally settled on the rolled flower piece with ruffled leaf shapes. Here are a few close ups.
Everything was varnished with a satin varnish. Love the final product. I'll need to keep experimenting for more looks.
I'm also showing how I created a wire hook for the back and covered the center hole in the record.
It was fun to experiment with all of these different looks. I lvoe adding the polymer clay to the acrylic poured paintings.
I love paint! And I'm fascinated by the art of fluid acrylic pouring. This free form art allows the artist to focus on color and interesting textures and techniques. I've done a number of acrylic pouring paintings in the past and am getting back to it now. I happened on these 45 records at the thrift store. Finding these 45s brought me right back to my teenage years and was a thrill in and of itself (although in honesty, none of the 45s I found would be considered cool then or now). LOL They're a great size, though,at 7 inches.
I have some plans for these to incorporate polymer clay sculptural elements in the center. Hope I can turn what's in my head into great art.
Hi All, hope you enjoy trying out new techniques. This is a 2 part tutorial. In Part 1, you'll learn to use fluid acrylic paint and ink to create a polymer clay veneer to use in making this summery pendant. The DecoArt Media fluid acrylic I used is so luscious. In Part 2 you'll learn to make the beaded knotted necklace for a great look. Thanks for joining me in my studio to learn polymer clay and jewelry making techniques. Hope you enjoy.
Pasta Machine
Oven
Clay Blade
Jewelry Pliers - round nose and chain nose
Wire Cutter
Craft Knife
Jewelry Shape Templates - either Cool Tools or make your own with card stock or plastic
Texture Sheet
Straw - cocktail size
Knitting Needle or other needle tool if needed to help with knotting
Hand Drill - size to match bail
Baking Form - 3" glass vase
Materials
Clay - Sculpey Premo! - Bright Green Pearl and Peacock Pearl
Paint - DecoArt Media in Cadmium Orange Hue and Cobalt Teal Hue
Liquitex Ink - Gold
Krylon Pen - 18K Gold or other pen to add striping
Stringing Material - I used cotton cording; 9 ea 24" strands
Pinch Bail - 1 ea
Jump Rings - 2 ea, 6mm and 1ea 9mm, or size to fit
End Cap - 2 ea 4mm, or size to fit cords
Wire - 22 gauge, 2ea 4" pieces
Hypo Cement or other glue for necklace ends
Beads - 28 ea 6mm or size of your choice to match stringing material and clay; I used 3 colors of acrylic beads; Color A (Blue) 12 ea; Color B (Green) 8 ea; Color C (Orange) 8 ea
Genesis Medium Thick Extender or Liquid Clay
Varnish - Varathane water based varnish
Visit Sweet Willow Designs' Amazon Store for the great products I use in my studio and help me keep videos coming! Click here to visit:
http://astore.amazon.com/sweewilldesi-20
Disclosure: All opinions are my own. I participate in several affiliate programs. That means I receive a commission when products are purchased through links posted on my videos. (At NO additional cost to you.) This allows me to bring you more videos! This is how I earn compensation by sharing tips, techniques and projects with you. The affiliate programs I use include Simon Says Stamp, Amazon and Michaels. These are stores I shop at for the products I use.
Use the hashtag #LoveArt to see all the great videos by members of the Creative Arts Collaboration group.
This pretty, vintage look polymer clay heart and key pendant is easy to make and customize. Use a skeleton key as a base to add a heart, stamped clay and patina for an unique pendant or hanging ornament.
Visit Sweet Willow Designs' Amazon Store for the great products I use in my studio and help me keep videos coming! Click here to visit: http://astore.amazon.com/sweewilldesi-20
SUBSCRIBE:
Subscribe to my Channel: https://www.youtube.com/c/SweetWillowDesigns?sub_confirmation=1
Disclosure: All opinions are my own. I participate in several affiliate programs. That means I receive a commission when products are purchased through links posted on my videos. (At NO additional cost to you.) This allows me to bring you more videos! This is how I earn compensation by sharing tips, techniques and projects with you. The affiliate programs I use include Simon Says Stamp, Amazon and Michaels. These are stores I shop at for the products I use.