Hi All! You can learn to make this polymer clay faux wood slice and faux wood burning necklace with pine cones. This is a fun way to celebrate the winter season. See how to make the wood slice and create a snowflake pattern. Use multiple wood slices to make a real statement necklace or use just one for a neat mixed media pendant. Hope you enjoy. Check out some of the products I use in my studio that I think you'll love!
Disclosure: All opinions are my own. I participate in the Amazon Affiliate program. That means I receive a commission when products are purchased through links posted on my videos. (At NO additional cost to you.) This allows me to bring you more videos! Thanks for supporting my channel and art work!
Been working on some polymer clay focal pendants. In this piece i've added leather cord and used silver wire and beads to create a free form bail. Love the way it turned out.
In my last post I shared my latest acrylic pour painting on 45 records I found at the thrift store. I love the way the paintings turned out. The DecoArt paint I used was luscious and I thought the technique was beautiful. It needed something though so I pulled out some polymer clay and tried a few different focal pieces.
The one on the top right is a traditional swirl, left is a spikey flower and finally bottom right is a rose style focal.
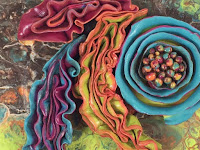
I tried all of these out and finally settled on the rolled flower piece with ruffled leaf shapes. Here are a few close ups.
Everything was varnished with a satin varnish. Love the final product. I'll need to keep experimenting for more looks.
I'm also showing how I created a wire hook for the back and covered the center hole in the record.
It was fun to experiment with all of these different looks. I lvoe adding the polymer clay to the acrylic poured paintings.
Hi All, hope you enjoy trying out new techniques. This is a 2 part tutorial. In Part 1, you'll learn to use fluid acrylic paint and ink to create a polymer clay veneer to use in making this summery pendant. The DecoArt Media fluid acrylic I used is so luscious. In Part 2 you'll learn to make the beaded knotted necklace for a great look. Thanks for joining me in my studio to learn polymer clay and jewelry making techniques. Hope you enjoy.
Pasta Machine
Oven
Clay Blade
Jewelry Pliers - round nose and chain nose
Wire Cutter
Craft Knife
Jewelry Shape Templates - either Cool Tools or make your own with card stock or plastic
Texture Sheet
Straw - cocktail size
Knitting Needle or other needle tool if needed to help with knotting
Hand Drill - size to match bail
Baking Form - 3" glass vase
Materials
Clay - Sculpey Premo! - Bright Green Pearl and Peacock Pearl
Paint - DecoArt Media in Cadmium Orange Hue and Cobalt Teal Hue
Liquitex Ink - Gold
Krylon Pen - 18K Gold or other pen to add striping
Stringing Material - I used cotton cording; 9 ea 24" strands
Pinch Bail - 1 ea
Jump Rings - 2 ea, 6mm and 1ea 9mm, or size to fit
End Cap - 2 ea 4mm, or size to fit cords
Wire - 22 gauge, 2ea 4" pieces
Hypo Cement or other glue for necklace ends
Beads - 28 ea 6mm or size of your choice to match stringing material and clay; I used 3 colors of acrylic beads; Color A (Blue) 12 ea; Color B (Green) 8 ea; Color C (Orange) 8 ea
Genesis Medium Thick Extender or Liquid Clay
Varnish - Varathane water based varnish
Visit Sweet Willow Designs' Amazon Store for the great products I use in my studio and help me keep videos coming! Click here to visit:
http://astore.amazon.com/sweewilldesi-20
Disclosure: All opinions are my own. I participate in several affiliate programs. That means I receive a commission when products are purchased through links posted on my videos. (At NO additional cost to you.) This allows me to bring you more videos! This is how I earn compensation by sharing tips, techniques and projects with you. The affiliate programs I use include Simon Says Stamp, Amazon and Michaels. These are stores I shop at for the products I use.
Use the hashtag #LoveArt to see all the great videos by members of the Creative Arts Collaboration group.
This pretty, vintage look polymer clay heart and key pendant is easy to make and customize. Use a skeleton key as a base to add a heart, stamped clay and patina for an unique pendant or hanging ornament.
Visit Sweet Willow Designs' Amazon Store for the great products I use in my studio and help me keep videos coming! Click here to visit: http://astore.amazon.com/sweewilldesi-20
SUBSCRIBE:
Subscribe to my Channel: https://www.youtube.com/c/SweetWillowDesigns?sub_confirmation=1
Disclosure: All opinions are my own. I participate in several affiliate programs. That means I receive a commission when products are purchased through links posted on my videos. (At NO additional cost to you.) This allows me to bring you more videos! This is how I earn compensation by sharing tips, techniques and projects with you. The affiliate programs I use include Simon Says Stamp, Amazon and Michaels. These are stores I shop at for the products I use.
It's a collaboration with Stephanie Power Bergeron of Deliberately Creative! Stephanie created a turquoise doodle gem and I've recreated it in polymer clay. Join me in my studio for this fun jewelry making project where we'll make polymer clay faux turquoise and a wonderfully intricate frame.
Visit Sweet Willow Designs' Amazon Store for the great products I use in my studio and help me keep videos coming! Click here to visit: http://astore.amazon.com/sweewilldesi-20
Materials
Clay - Sculpey Premo! white, deep blue, copper, burnt umber
Paint - DecoArt Americana (Lamp Ebony Black) Golden Fine Iridescent Gold
Plastic Wrap
Paper towel
Necklace finding
Jump ring - 9mm or as large as needed for size of pendant
Bail - size to fit necklace fnding
SUBSCRIBE:
Subscribe to my Channel: https://www.youtube.com/c/SweetWillowDesigns?sub_confirmation=1
Disclosure: All opinions are my own. I participate in several affiliate programs. That means I receive a commission when products are purchased through links posted on my videos. (At NO additional cost to you.) This allows me to bring you more videos! This is how I earn compensation by sharing tips, techniques and projects with you. The affiliate programs I use include Simon Says Stamp, Amazon and Michaels. These are stores I shop at for the products I use.
Join me to make these colorful silk screened polymer clay Hamsa hand pendants. We'll use a silk screen and DecoArt Americana paint to lay the base pattern and then add colorful bits of clay to add zing! The Hamsa hand is thought to be a protective sign. It is also thought to bring it's owner happiness, luck, health, and good fortune. Hope you enjoy this project.
Visit Sweet Willow Designs' Amazon Store for the great products I use in my studio and help me keep videos coming! Click here to visit: http://astore.amazon.com/sweewilldesi-20
Tools:
Hamsa hand cookie cutter or paper template
Sculpey Silk Screen kit or silk screen of choice
Oven: http://amzn.to/29a3sE5
Pasta Machine: http://amzn.to/298Jho9
Clay blade
Craft knif
Paint brush or applicator for varnish
Materials:
Clay Premo! Sculpey: Ecru PE02 5093 and small amounts of colorful scraps
Paint DecoArt Americana Peacock Teal acrylic paint DA326
Varathane varnish matte: http://amzn.to/295MRxN
Varathane varnish gloss: http://amzn.to/29a5jca
Jump rings
Necklace findings
Plastic wrap
Disclosure: All opinions are my own. I participate in several affiliate programs. That means I receive a small commission when products are purchased through links posted on my videos. (At NO additional cost to you.) This allows me to bring you more videos! The affiliate programs I use include Simon Says Stamp, Amazon and Michaels. These are stores I shop at for the products I use. I'm also a member of DecoArts Helping Artists program. Love all of these stores and products!
Learn to make polymer clay buttons with regular button holes and two ways to make shank buttons. This is such a fun project to make custom buttons to match a fabric, purse, special outfit or use in button jewelry and mixed media projects. Hope you enjoy.
PRODUCTS
Some of the following are affiliate links to products used in this video. By using these links I receive a small commission (no extra charge to you) which helps support me in bringing you new videos each week. Thank you!
Disclosure: All opinions are my own. I participate in several affiliate programs. That means I receive a commission when products are purchased through links posted on my videos. (At NO additional cost to you.) This allows me to bring you more videos! This is how I earn compensation by sharing tips, techniques and projects with you. The affiliate programs I use include Simon Says Stamp, Amazon and Michaels. These are stores I shop at for the products I use.
Polymer clay fish pendant. Learn to make a colorful fish with fun movement. This polymer clay project is a great way to add movement and playfulness to your jewelry wardrobe. Clay, eye pins, jump rings, basic tools and a bright cord are all the supplies you'll need. Check out all the great videos in the #LoveSummerArt series by the artists of the Creative Arts Collaboration group.
GREAT STUDIO PRODUCTS:
The links go through my Amazon Affiliate program, and you support my channel when using them.
Disclosure: All opinions are my own. I participate in several affiliate programs. That means I receive a commission when products are purchased through links posted on my videos. (At NO additional cost to you.) This allows me to bring you more videos! This is how I earn compensation by sharing tips, techniques and projects with you. The affiliate programs I use include Simon Says Stamp, Amazon and Michaels. These are stores I shop at for the products I use.
Polymer clay tutorial for a faux leather, faux rivet pendant. Learn to make this polymer clay pendant with a faux leather, faux rivet look. This versatile pendant can be strung on a variety of materials. We'll use polymer clay, scrapbook brads, a cool texture plate and paint for the patina. Go casual with this pendant or dress it up. Hope you enjoy. Thanks for joining me in my studio.
Visit my Amazon store for the products you need to build a great polymer clay studio and complete the projects in my videos. Sweet Willow Designs Store: http://astore.amazon.com/sweewilldesi-20
Tools
Oven
Pasta Machine
Cutters - 1-1/2", 1" and 3/4" (Ateco Cutters)
Texture Plate - Darice Embossing Folder "Fall Leaf Background"
Needle tool
Paint brush
Hand drill or electric drill
Light bulb - round vanity style
Materials
Clay - Premo! any color for the center cabochon, bronze or other to simulate leather
Scrapbook brads - small 7 ea, color of your choice
Jump ring - 9mm or large enough to accommodate bail or stringing material
Bail - large enough to accommodate stringing material
Necklace finding
Disclosure: All opinions are my own. I participate in several affiliate programs. That means I receive a commission when products are purchased through links posted on my videos. (At NO additional cost to you.) This allows me to bring you more videos! This is how I earn compensation by sharing tips, techniques and projects with you. The affiliate programs I use include Simon Says Stamp, Amazonand Michaels. These are stores I shop at for the products I use.
Cool Tools Alpha Disc Lettering System Un-boxing and product review. Join me in my studio to see how this new to me lettering system works. I've been using the traditional metal stamps you can find at the craft store or Harbor Freight and really wanted something else with more variety in font style and size. So, I came across a recommendation for this lettering system from Cool Tools. You can order sets that include 5 different fonts and includes capital letters, lower case and numbers/symbols. Let's see how these work.
Disclosure: All opinions are my own. I participate in several affiliate programs. That means I receive a commission when products are purchased through links posted on my videos. (At NO additional cost to you.) This allows me to bring you more videos! This is how I earn compensation by sharing tips, techniques and projects with you. The affiliate programs I use include Simon Says Stamp, Amazon and Michaels. These are stores I shop at for the products I use.
Hi All, Thanks for joining me in my studio. Learn now to make a handmade polymer clay interchangeable bracelet in this video tutorial. We'll use a leather bracelet and make our own unique bracelet components to change out the look of our bracelet. Learn to make the bracelet component, use jump rings as the connectors, add pearlescent powders or acrylic paint to add unique, colorful patinas.
This is a great project to use with the teenagers/tweens. You can create all kinds of fun accessories with this tutorial. Hope you enjoy.
Disclosure: All opinions are my own. I participate in several affiliate programs. That means I receive a commission when products are purchased through links posted on my videos. (At NO additional cost to you.) This allows me to bring you more videos! This is how I earn compensation by sharing tips, techniques and projects with you. The affiliate programs I use include Simon Says Stamp, Amazon and Michaels. These are stores I shop at for the products I use.
Hi
All, thanks for joining me in my studio as we learn how to make these really elegant
articulated dangle earrings from polymer clay.
These earrings measure approximately 3-1/2” and have a lot of
movement. Use your own templates or
download mine (link to my blog below) for this simple project that has endless
design possibilities. Hope you
enjoy. Thanks for joining me in my
studio. Take care.
Jewelry
looping pliers – Wolf Groovy Looping Plier-3 Grooves -
PLR-751.00 - http://amzn.to/1UYOaEj These are great as they have 3 grooves for
consistent loops
Texture Sheet –Judikins Clay Squisher 1960s Design - http://amzn.to/1VYAxVp These go great through the pasta machine!
Stencil
sheet – EZ Quilting
882670027 Quilter's Template Plastic Assortment, 6-Piecehttp://amzn.to/1M6Ishb The quilters use these but they are so
helpful for making templates for polymer clay.
Visit
my Amazon store for other great products I use in my studio.
Template
– see links above to my blog for the template; make this from paper or stencil
sheet
Jewelry
pliers – round nose and chain nose
Materials
Clay –
Premo Black
Texture
sheets – Squishers, Kato
Ear
wires – 2 ea
Eye
pins – 6 ea
Acrylic
paint – your choice of colors
Sandpaper
Stencil
sheet (optional) Disclosure: All opinions are my own. I participate in several affiliate programs. That means I receive a commission when products are purchased through links posted on my videos. (At NO additional cost to you.) This allows me to bring you more videos! This is how I earn compensation by sharing tips, techniques and projects with you. The affiliate programs I use include Simon Says Stamp, Amazon, and Michaels. These are all stores I shop at for the products I use.
Hi All, thanks for joining me in my studio. Today' we'll make our own portal into the fairy world with the sweet polymer clay fair door earrings. These simple earrings can be embellished any way you want by changing up the color and beads.
The legend is that these fairy doors are the portal to the fairy world and true believers can enter through these doors. I hope you enjoy this project. See the tools and materials list below.
Kemper Klay Cutter - 3/16" 4 basic shapes - flower, teardrop, circle and heart http://amzn.to/1MuNH4W
Tools
Oven
Pasta Machine
Craft blade
Craft knife
Needle tools
Embossing tool
Jewelry pliers - round nose and cutters
Cutters - 3/16" heart and flower; 1" and 3/4" circle
Materials
Clay - Raw Sienna and various colors for flowers. I use Sculpey Premo!
Paint - Burnt Sienna or other dark brown (optional)
Earring findings - 2 ea of ear wire, ear nut, eye pin and head pin
Beads - 2 ea
Disclosure: All opinions are my own. I participate in several affiliate programs. That means I receive a commission when products are purchased through links posted on my videos. (At NO additional cost to you.) This allows me to bring you more videos! This is how I earn compensation by sharing tips, techniques and projects with you. The affiliate programs I use include Simon Says Stamp, Amazon, Dick Blick and Michaels. These are all stores I shop at for the products I use.
Hi All, thanks for joining me in my studio. This is the second Polymer Clay Workbench. In this video tutorial, we'll use the bracelet form we made to make a simple, basic cuff. The construction techniques used in this cuff can be translated into so many different styles with endless options for embellishments. Stay tuned for the end of the video where there's a poll for the next bracelet project. Hope you enjoy and thanks again for joining me in my studio. Take care.
Tools/Materials:
Oven
Pasta Machine
Extruder with small rectangle die
Texture sheets/plates
Paint
Sandpaper - 240 & 400 grit
Sanding tub, water & dish detergent
Paper Towel
Clay Blade
Bracelet template
Bracelet bender or 1-1/2" glass jar
Bracelet blanks - aluminum 1/2" or 3/4" inch
Disclosure: I participate in several affiliate programs. That means I receive a commission when products are purchased through links posted on my videos. (At NO additional cost to you.) This allows me to bring you more videos! This is how I earn compensation by sharing tips, techniques and projects with you. The affiliate programs I use include Simon Says Stamp, Amazon, and Michaels. These are all stores I shop at for the products I use.
Hi All, Thanks for joining me in my studio. I'm starting a new series called "Polymer Clay Workbench". In this series we'll look at polymer clay basics, answer questions and work on techniques that improve the quality and beauty of polymer clay projects. I'll also share the products I like to help you build your studio and polymer clay art room (see links below). I hope you enjoy this series.
In the first Polymer Clay Workbench, we'll look at how to add strength and flexibility to polymer clay cuff bracelets. It's common for new clayers to make their cuffs only from polymer clay. Many experience softening as the skin warms the clay or breakage. I'll show you how to use bracelet blanks/forms to add the needed strength and flexibility. We'll focus on cuffs in this video. Just the underlying structure. In a future video we'll make a cuff using this technique. You'll see how you use basic tools/materials to make your bracelet form. I hope you enjoy. Let me know what you think about this series. Thanks as always for watching, liking and subscribing to my channel. Following are some affiliate links for products that help you build your studio.
Build your studio:
Bracelet Bender (The exact one I use is no longer available. Here's an inexpensive one of equal quality): http://amzn.to/1LYmLdu
Aluminum Bracelet Blanks 25 1/2" Pieces: http://amzn.to/1L7f8GE
Aluminum Bracelet Blanks 25 3/4" Pieces: http://amzn.to/1LYnifp
Aluminum Bracelet Blanks 144 Pieces: http://amzn.to/1L7f3mw
Aluminum Bracelet Blank Preformed 5 1/2" pieces (Note: this doesn't get a great review on Amazon because the reviewer said they were too lightweight - this is what we want!): http://amzn.to/1TvVTJY
Brass Channel Bracelet Blank 1 5/16" piece: http://amzn.to/1TeLHF8
Silver plated Channel Bracelet Blank 1 ea .929" channel space: http://amzn.to/1TeM4zC
Tools/Materials:
Bracelet bender or 1-1/2" glass jar
Bracelet blanks - aluminum 1/2" or 3/4" inch
Aluminum strips - if you want to make your own
Heavy duty metal snips
Chain nose pliers
Disclosure: I participate in several affiliate programs. That means I receive a commission when products are purchased through links posted on my videos and blog. (At NO additional cost to you.) This allows me to bring you more videos, blog posts and tutorials! This is how I earn compensation by sharing tips, techniques and projects with you. The affiliate programs I use include Simon Says Stamp, Amazon, and Michaels. These are all stores I shop at for the products I use.
Hi All, join me in my studio to make these fun Spring Sprung Polymer Clay Inchies. These inchies have colorful hearts, flowers and a whimsical spring with a bright bead on the end. I hope you enjoy this project. The tools and materials list follows the video.
Tools
Oven
Pasta machine or clay roller
Cutters - 1" square, 3/4" heart, 1/2" flower and 1/8" round
Wire cutters
Round nose pliers
Needle tool, bamboo skewer to make the wire spring
Texture plate
Embossing tools
Clay blade
Tile
Hi All, thanks for joining me in my studio as we make this polymer clay spring heart bouquet necklace. This sweet project uses small amounts of clay to make a swirl base shaped into a heart, roses and leaves. You can do this in pastels, or use all one color of clay for a monochromatic look. Any way you do it, the project is dainty and sweet. Your Mother, Mother-in-law or Grandma would love this. You can make it into a necklace or add a pin back and you have a beautiful lapel pin. See the materials and tools list right after the video.
Thanks again for joining me in my studio, I hope you enjoy this project. Take care.
Tools
Oven
Pasta Machine
Ball stylus
Craft knife
Craft blade
Glass or ceramic tile or acrylic block
Materials
Clay - white base with small amounts of light blue and other pastel colors for roses and leaves
Bail - glue on
Necklace finding
Glue - E6000
Subscribe to my YouTube Channel: http://bit.ly/1Ny4aEY
Join me as I collaborate with three other fantastic Colorado YouTube artists. We found each other through the YouTube Creative Arts Collaboration group and have met and enjoyed each other's company as we share our love of art and YouTube. We're doing a collaboration where we each made a special, handmade item and a goodie bag of all kinds of materials for us to use in an upcoming project. This first video shows how each of made the handmade item and the second video will show our final project. My project is handmade polymer clay mini mosaics using acrylic paint, Pan Pastels and pearlescent powder.I hope you enjoy this collaboration. See the links below to Shemi Dixon, Ina Solsberry and Pam Tanino videos. See full tools and materials list for my project below the links.
Tools
Oven
Pasta machine
Clay blade
Baking tile
Paint brush
Cutters - optional various sizes and types
Materials
Polymer clay - Premo! black and white, each tile takes approx. one block of clay
Pearlescent powder
Pan Pastel metallic or chalk pastels
Sealer - only if the piece will get some use/wear, otherwise not needed
#LoveWinterArt How to Make a Polymer Clay Santa's Reindeer Necklace. Join me in my studio and learn to make a polymer clay holiday necklace with Rudolph the Red Nose Reindeer and Dasher and Dancer, Prancer and Vixen, Comet and Cupid, Donner and Blitzen, Santa's eight reindeer. This polymer clay necklace is a fun way to wear the holidays. Hope you enjoy and thanks for joining me in my studio.
Check out all the other great artists participating in the #LoveWinterArt - just search YouTube for the hashtag.
Subscribe to my Channel: http://bit.ly/1Ny4aEY
Tools
Oven
Pasta machine
Jewelry pliers - chain nose
Cutters - round 1-1/2 and 1-1/4", various mini cutters 3/4" and 3/16" tear drop, 3/16" round, leaf cutter
Craft knife
Needle tool
Ball stylus
Extruder with medium round disk
Hollow bead maker or light bulb
Texture sheet or rough sandpaper
Materials
Clay - Premo! light blue, white, burnt umber, raw sienna, red, green, black
Genesis medium or liquid clay
Jump rings - 10mm and 5mm
Chain - approx 9"
Snowflake buttons - optional
Tiny jingle bells - optional
Toggle clasp